When creating custom packaging for your business you need a clear process, realistic expectations, and the right supplier to guide you through it.
Plus Packaging has been helping businesses create custom packaging for nearly 50 years. We’ve worked with thousands of companies designing their first packaging, and we know exactly where people get stuck.
This guide will teach you exactly how to create custom packaging from start to finish. You’ll learn what packaging to choose, how to design it, what it costs, and how to work with suppliers. By the end, you’ll have a clear roadmap for creating packaging that protects your products and strengthens your brand.
Before You Start: Answer These Three Questions
Don’t jump straight into design. Answer these questions first to avoid expensive mistakes later.
What’s Your Budget Per Unit?
Figure out what you can spend on each piece of packaging. Basic poly mailers start around $0.50-$1.00 per unit for small orders. Custom printed boxes run $1.50-$5.00 depending on size and complexity.
Packaging typically runs 5-15% of retail price. A $30 product can support $1.50-$4.50 in packaging costs.
What’s Your Order Volume?
Most suppliers require 500-1,000 unit minimums for custom printed packaging. For your first run, aim for 3-6 months of inventory based on realistic sales projections.
Order too few and you’ll pay premium prices. Order too many and you’re stuck with inventory if you need to make changes.
What’s Your Timeline?
Custom packaging takes 6-8 weeks from start to finish. Break it down: one week for quotes, one week for design, one week for samples, then 3-4 weeks for production and shipping.
Start the packaging process at least two months before you need to ship products.
Step 1: Choose Your Packaging Type
Your product determines your packaging type. Pick based on what your product needs, not what looks coolest.
Mailing Bags for Shipping
Mailing bags work for non-fragile items that ship directly to customers. Apparel, textiles, and soft goods fit this category.
Poly mailers are lightweight, water-resistant, and cost-effective. They keep shipping costs low and protect products during transit. Paper mailers offer a more sustainable option with similar protection. Bubble mailers add cushioning for items needing extra protection.
Mailers are the most economical choice for eCommerce businesses. They’re easy to store, simple to pack, and customers can easily open them.
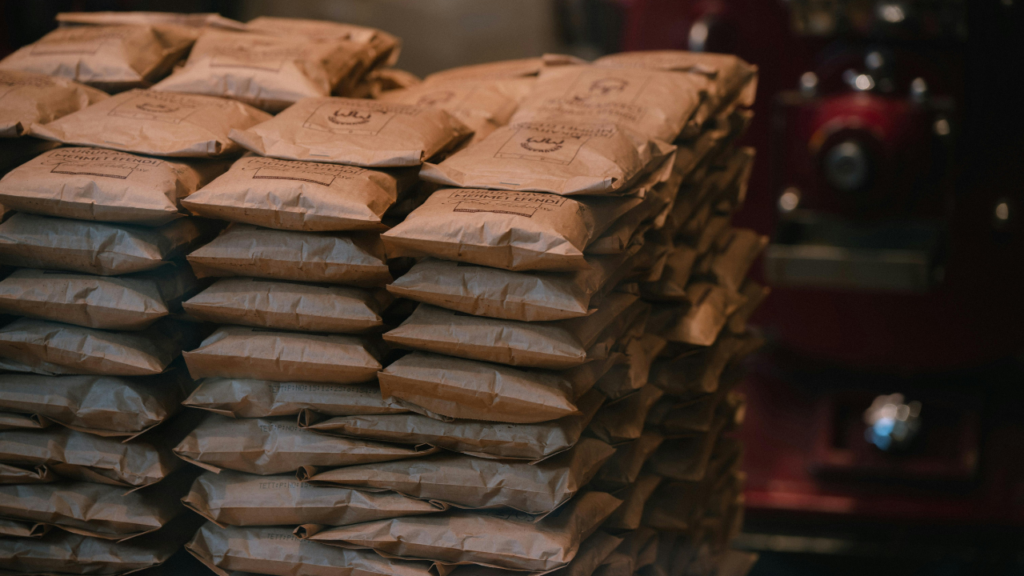
Boxes for Protection and Presentation
Custom boxes provide maximum protection and premium presentation. Use them for fragile items, products with multiple components, or when you want to create an upscale unboxing experience.
Mailer boxes ship flat and fold together without tape. They’re sturdy enough for shipping and nice enough that customers see your branding immediately. Gift boxes work for retail display or premium packaging where presentation matters most.
Boxes cost more than mailers but justify the expense for higher-priced products or items requiring extra protection.
Retail Bags for In-Store Sales
Retail bags work for brick-and-mortar stores or events. Paper bags with handles make carrying easy and provide walking advertising for your brand. Plastic retail bags cost less and work for smaller, lighter items.
Retail bags serve double duty as packaging and marketing. Customers carry them around, showing your brand to everyone they pass.
Consider Add-Ons
Think about interior packaging too. Tissue paper adds a premium touch for minimal cost. Custom tape turns plain boxes into branded packaging. Stickers, thank you cards, and inserts personalize the experience.
These extras cost pennies per unit but make your packaging feel more thoughtful and professional.
Step 2: Decide on Size and Material
Get the size right and choose materials that match your needs and budget.
Measure Your Product Correctly
Measure your product at its largest dimensions. Add 1-2 inches on each side for padding and ease of packing. Packaging that’s too tight makes fulfillment difficult. Packaging that’s too big wastes money on materials and shipping costs.
For boxes, measure length, width, and height. For bags, measure length and width when flat. If you’re packaging multiple items together, measure them as they’ll be packed.
Create a simple prototype with cardboard to test the fit before ordering. This catches sizing issues early.
Material Options and Trade-Offs
Each material has strengths and limitations.
Poly (plastic) materials are water-resistant, tear-resistant, and lightweight. They keep shipping costs down and protect products in transit. The downside is environmental impact, though recyclable options exist.
Paper and cardboard offer better sustainability and a premium feel. Customers appreciate eco-friendly choices. Paper costs slightly more and provides less water resistance than poly.
Corrugated cardboard gives maximum protection for boxes. The fluting absorbs impact during shipping. Choose single-wall for lighter items, double-wall for heavier products.
Kraft paper has a natural, eco-friendly look that works well for brands emphasizing sustainability. It’s fully recyclable and biodegradable.
Factor in Sustainability
Customers care about environmental impact. Even small changes matter. Recyclable materials, minimal packaging, and sustainable sourcing all contribute to a better environmental footprint.
Communicate your sustainability choices on the packaging. Customers want to support businesses aligned with their values. Simple callouts like “100% recyclable” or “made from recycled materials” reinforce your commitment.
Balance sustainability with cost and functionality. You don’t need perfect solutions immediately. Start with one sustainable choice and build from there.
Step 3: Design Your Packaging
Good design makes your packaging recognizable and professional. You don’t need to be fancy for your first run.
Start Simple
Begin with your logo and brand colors. That’s enough for effective packaging. A clean design with your logo prominently displayed beats a cluttered design with too many elements.
Choose 2-3 colors maximum. Too many colors increase printing costs and can look messy. Stick to your brand palette for consistency across all customer touchpoints.
Include essential information: your brand name, website, and any required product information or warnings. Keep text readable. Small fonts look sophisticated in design software but become illegible on actual packaging.
What Actually Matters in Design
Logo placement should be prominent and centered. Customers should see it immediately when receiving the package.
Color accuracy matters for brand recognition. Provide exact color codes (Pantone or CMYK) to your supplier. Colors look different on screen than in print, so request a physical proof before full production.
Print quality affects perception. Blurry logos or pixelated graphics look unprofessional. Use high-resolution files (300 DPI minimum) for all artwork.
Functionality beats aesthetics. Make sure your packaging opens easily, closes securely, and protects the product. Beautiful packaging that fails functionally creates problems.
Common Design Mistakes
Text too small to read easily. Aim for 10-point font minimum for body text, larger for key information.
Colors that don’t match your brand. Inconsistent colors confuse customers and weaken brand recognition.
Overcomplicated designs that cost more to print and look cluttered. Simple, clean designs communicate better and cost less.
Forgetting about the inside. If customers see the interior, make it look intentional. A branded interior or simple pattern elevates the experience.
When to Hire a Designer vs DIY
DIY works if you have a simple logo and clear brand guidelines. Many suppliers offer free design support for basic layouts.
Hire a designer if you need custom illustrations, complex layouts, or don’t have clean logo files. A few hundred dollars for professional design prevents costly reprints later.
Some suppliers include design services. Ask about this when getting quotes.
Step 4: Find and Vet Suppliers
Choosing the right supplier matters as much as choosing the right packaging. A good supplier becomes a partner who helps your business grow.
Questions to Ask Before Committing
What are your minimum order quantities? Make sure their minimums match your needs. Some suppliers work with smaller businesses, others focus on large corporations.
What’s your typical lead time? Get specific timeframes for design approval, production, and shipping. Ask what causes delays and how they communicate if problems arise.
Do you offer samples? Never order without seeing samples. Physical samples show material quality, color accuracy, and construction better than any photo.
What are your payment terms? Understand deposit requirements, payment schedules, and accepted payment methods. Watch for red flags like requiring full payment upfront.
Can you provide references? Talk to other businesses who’ve worked with them. Ask about quality, reliability, and customer service.
Red Flags When Evaluating Suppliers
Suppliers who won’t provide samples are hiding something. Vague answers about timelines suggest unreliable delivery. Prices far below competitors often mean corner-cutting on quality. Poor communication during the quote process only gets worse after you order.
No physical address or unclear business information raises concerns about legitimacy. If you can’t verify who you’re working with, find someone else.
Domestic vs Overseas Suppliers
Domestic suppliers typically offer faster turnaround, easier communication, and simpler logistics. You can visit facilities if needed and resolve issues quickly. Shipping costs less and arrives faster.
Overseas suppliers can offer lower prices, especially for large quantities. But longer lead times, language barriers, and complex logistics create challenges. Minimum orders tend to be higher too.
For your first order, domestic suppliers reduce risk and complexity. As you scale and need larger volumes, overseas options become more attractive.
How to Read Quotes and Spot Hidden Fees
Get detailed written quotes. A complete quote includes per-unit cost at different quantities, setup or plate fees, shipping costs, and any additional charges.
Setup fees cover creating printing plates or dies for your custom design. These run $100-$500 depending on complexity. You pay them once, then only pay per-unit costs for reorders.
Shipping adds up fast. A quote for $1 per unit means nothing if shipping costs $0.50 per unit. Get the total landed cost.
Watch for revision fees, rush fees, and storage fees. Some suppliers charge for design changes, expedited production, or holding inventory. Know these costs upfront.
Why We’ve Been Doing This for Nearly 50 Years
At Plus Packaging, we’ve spent nearly five decades helping businesses create packaging that works. We know the questions you have because we’ve answered them thousands of times.
We offer flexible minimums, transparent pricing, and hands-on support. As a women-owned business, we help you meet supplier diversity goals while getting the quality and service you need. Our team walks you through the entire process, from choosing the right packaging type to final production.
Step 5: Order Samples and Test Thoroughly
Samples prevent expensive mistakes. Always order them before committing to production.
Why Samples Are Non-Negotiable
Screen images lie. Colors look different in print. Materials feel different in person. Dimensions that seem right on paper might be wrong in reality.
Samples let you test functionality. Can you pack products easily? Does the packaging protect items during shipping? Is it easy for customers to open?
Get feedback from your team. Show samples to warehouse staff who’ll pack orders daily. They’ll spot problems you miss.
What to Test For
Material quality: Does it feel cheap or substantial? Does it tear easily? Is it thick enough?
Color accuracy: Compare printed colors to your brand guidelines. Slight variations become obvious when you see samples.
Print quality: Check for crisp text, clean lines, and good image reproduction. Look for any smudging or misalignment.
Structural integrity: For boxes, fold and unfold them several times. Do corners stay tight? Do flaps line up correctly?
Functionality: Pack actual products. Ship a sample to yourself. See what arrives damaged or if anything shifts during transit.
How to Give Feedback That Gets Results
Be specific. “The colors are off” doesn’t help. “The blue needs to be darker, closer to Pantone 2728” gives actionable direction.
Prioritize changes. Separate must-fix issues from nice-to-have adjustments. This speeds up the revision process.
Document everything with photos. Show exactly what needs to change. Written descriptions combined with visual references prevent misunderstandings.
Ask about costs before requesting changes. Some revisions are free, others trigger fees. Know the impact before committing.
Step 6: Place Your Order
You’ve done the work. Now it’s time to commit and move into production.
What to Confirm Before Producing
Review the final proof carefully. This is your last chance to catch mistakes. Check spelling, phone numbers, website URLs, and any legal copy. Mistakes in production become expensive inventory you can’t use.
Confirm quantities, delivery address, and timeline. Make sure everyone agrees on when production starts and when you’ll receive the finished packaging.
Verify payment terms and schedule. Know when deposits are due and when final payment is required.
Get everything in writing. Email confirmations work, but a formal purchase order is better. Include all specifications, agreed pricing, timeline, and delivery terms.
Typical Lead Times
Standard production runs 3-4 weeks after design approval. Add shipping time (1-2 weeks domestic, longer for international).
Rush production is available from most suppliers but costs 20-50% more. Rush fees are worth it for emergencies, not standard planning.
Plan reorders early. Don’t wait until you’re down to your last 50 units to reorder. Lead times don’t shrink because you’re in a hurry.
Payment Terms to Expect
Most suppliers require a 50% deposit to start production, with the balance due before shipping. This protects both parties.
Some offer net-30 terms for established customers after you’ve proven reliable. First-time orders almost always require deposits.
Credit cards typically accepted but may include processing fees. Wire transfers or ACH payments avoid fees but take longer to process.
Keep payment records organized. You’ll need them for reorders and accounting.
Cost Breakdown: What to Actually Expect

Understanding costs helps you budget accurately and make informed decisions.
Setup and Plate Fees
One-time setup fees range from $100-$500 depending on design complexity and printing method. Simple one-color designs cost less than full-color custom artwork.
These fees cover creating printing plates, dies, or digital files for production. You pay them once for the initial order. Reorders using the same design skip these fees.
Some suppliers waive setup fees for larger orders. Ask about this when negotiating.
Per-Unit Costs by Type
Prices vary based on size, material, printing, and quantity. Here are typical ranges for reference:
Poly mailers: $0.50-$1.50 per unit for orders of 500-1,000 units. Prices drop significantly at 2,500+ units.
Paper mailers: $0.75-$2.00 per unit, slightly more than poly due to material costs.
Custom boxes: $1.50-$5.00 per unit depending on size, material, and printing. Small mailer boxes start around $1.50. Large or complex boxes run $3-$5+.
Retail bags: $0.30-$1.50 per unit. Paper bags with handles cost more than simple plastic bags.
Tissue paper: $0.10-$0.30 per sheet. An inexpensive way to add premium feel.
Custom tape: $0.05-$0.15 per yard. Small cost, big branding impact.
Minimum Orders and Bulk Pricing
Most suppliers require 500-1,000 unit minimums for custom printing. Stock (unprinted) packaging has lower minimums but offers no branding.
Bulk pricing kicks in at different thresholds. You’ll see price breaks at 1,000, 2,500, 5,000, and 10,000 units typically. Ordering 2,500 units might cost only 20% more than 1,000 units, cutting your per-unit cost significantly.
Calculate your break-even point. Sometimes ordering more units upfront saves money long-term if you’ll use them within 6-12 months.
Hidden Costs to Consider
Shipping to you: Packaging is bulky. Shipping costs add up. Get quotes that include delivery to your location.
Storage space: Boxes take up room. Factor in storage costs if you’re renting warehouse space.
Packaging supplies: Don’t forget packing tape, labels, and void fill for shipping. These add to your total fulfillment costs.
Design revisions: Some suppliers charge for changes after initial design approval. Ask about revision policies upfront.
Rush fees: Need it faster? Expect to pay 20-50% more for expedited production.
Factor all costs into your per-unit calculation to understand true packaging expenses.
Getting Started: Your Action Checklist
Ready to create your custom packaging? Follow this checklist to stay organized and avoid missing critical steps.
Planning Phase:
- Calculate your budget per unit based on product pricing
- Determine how many units you need for 3-6 months
- Set your deadline working backwards from launch date
- Measure your products at largest dimensions
- Identify must-have vs nice-to-have features
Research Phase:
- List 3-5 potential suppliers based on your needs
- Request quotes from each with identical specifications
- Compare pricing, minimums, and lead times
- Check reviews and ask for customer references
- Verify they can meet your timeline
Design Phase:
- Gather high-resolution logo files (300 DPI minimum)
- Choose your brand colors (provide Pantone or CMYK codes)
- Decide on essential text and information to include
- Create mockups or work with supplier design team
- Get internal feedback on design concepts
Sample Phase:
- Order samples from top 2 suppliers
- Test samples with actual products
- Check color accuracy against brand standards
- Get team feedback on functionality
- Document any needed changes with photos
Production Phase:
- Review and approve final proof carefully
- Confirm quantities, pricing, and delivery dates
- Submit purchase order with all specifications
- Pay deposit to start production
- Schedule check-ins for production updates
Delivery Phase:
- Inspect first batch immediately upon arrival
- Test with actual fulfillment process
- Document any quality issues with photos
- Provide feedback to supplier
- Plan timing for reorder based on usage
Before reaching out to suppliers, gather this information to speed up the quoting process: exact product dimensions, estimated order quantity, desired materials, budget range, and timeline. Having these details ready helps suppliers provide accurate quotes faster.
Frequently Asked Questions
Can I order small quantities of custom packaging?
Yes, many suppliers work with small businesses and offer minimums starting at 500-1,000 units. Some go lower for simpler designs. Small quantities cost more per unit, but they let you test designs without major investment. As your volume grows, per-unit costs drop significantly.
At Plus Packaging, we understand small businesses need flexibility. We work with various order sizes and help you find options that fit your budget.
What if I don’t have a designer?
Many packaging suppliers offer free or low-cost design support for basic layouts. If you have a logo and brand colors, they can create simple, professional packaging designs.
For more complex needs, hire a freelance designer. Expect to pay $200-$500 for packaging design work. This investment prevents expensive mistakes and creates packaging that truly represents your brand.
Some suppliers include design services in their pricing. Ask about this when getting quotes.
What’s the minimum I need to spend?
Total first-order costs typically range from $500-$2,000 for most small businesses. This includes setup fees ($100-$500) plus per-unit costs for minimum quantities.
A basic order of 500 poly mailers with simple printing might cost $500-$750 total. Custom boxes with full-color printing for 1,000 units could run $1,500-$3,000.
Budget for samples too. Expect to spend $50-$150 on sample orders from multiple suppliers before committing to production.
How do I know which material to choose?
Match material to your product needs and brand values. Lightweight, non-fragile items work well in poly mailers. Heavier or fragile products need boxes. Retail sales benefit from bags with handles.
Consider your brand positioning too. Eco-conscious brands should prioritize paper and recyclable materials. Budget-focused brands might choose poly for cost savings. Premium brands often invest in thicker materials and special finishes.
When in doubt, order samples of different materials. See how they feel and function with your actual products.
Can I see samples before ordering?
You should always see samples before placing a full order. Reputable suppliers expect this and make it easy.
Most suppliers charge for samples but credit the cost toward your order if you move forward. Sample costs typically run $50-$100 including shipping.
Request samples of the exact material, size, and printing method you’re considering. Generic samples don’t tell you how your specific packaging will turn out.
Never skip samples to save time or money. The cost of fixing problems after production far exceeds sample costs.
Final Thoughts
Choose the right packaging type for your product, get the size and materials right, design something clean and recognizable, find a reliable supplier, test samples thoroughly, and order with confidence.
Good packaging protects your products and strengthens your brand. It creates positive first impressions and keeps customers coming back. The effort you put into getting it right pays off in customer satisfaction and brand recognition.
Ready to get started? Explore our packaging options and see how we can help you create packaging that works for your business.